|
Home > Tutorials > How to Schedule Scanning?
A scheduled
scan is an important component of threat and security risk protection.
Free AntiSpyware is equipped with a time scheduler
that lets you specify when to perform scheduled scan
according to your preferences. You may choose to run scheduled scans
at a certain time on a daily, weekly or monthly
basis to ensure your computer is free from harmful software. Step 1. Activate Customize Process Window
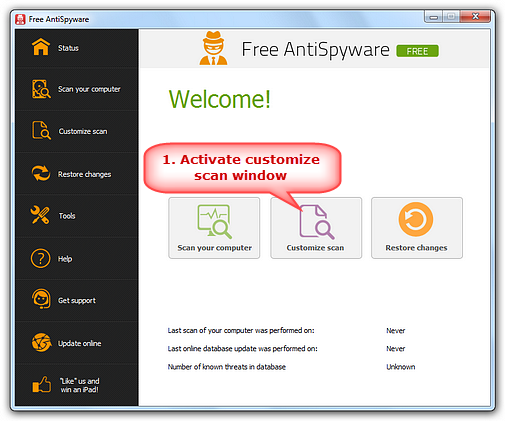
Launch
Free AntiSpyware and click "Customize scan".
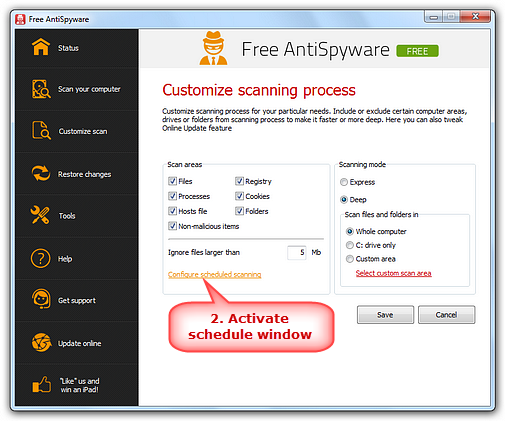
Then
click "Configure scheduled scanning"
and you will turn on task scheduler.
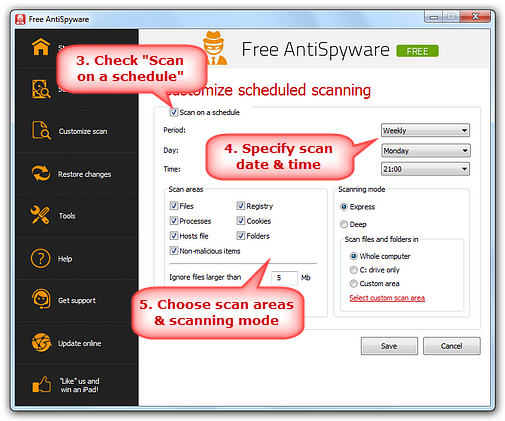
Check
"Scan on a schedule" to let the scanning
task process on Daily, Weekly or Monthly. Then,
you can specify the scan areas and scanning
mode. The files larger than the certain size you customized
can be ignored. Click "Save" and the
program will take proper action for all detected malware. For detailed customization, please go to How to Customize Scanning.
|
||||


